PCB StreamDeck
This custom PCB utalizes the Raspberry Pi Pico microcontroller and CircuitPython to create a mini DIY version of the Elgato Stream Deck.
Intro
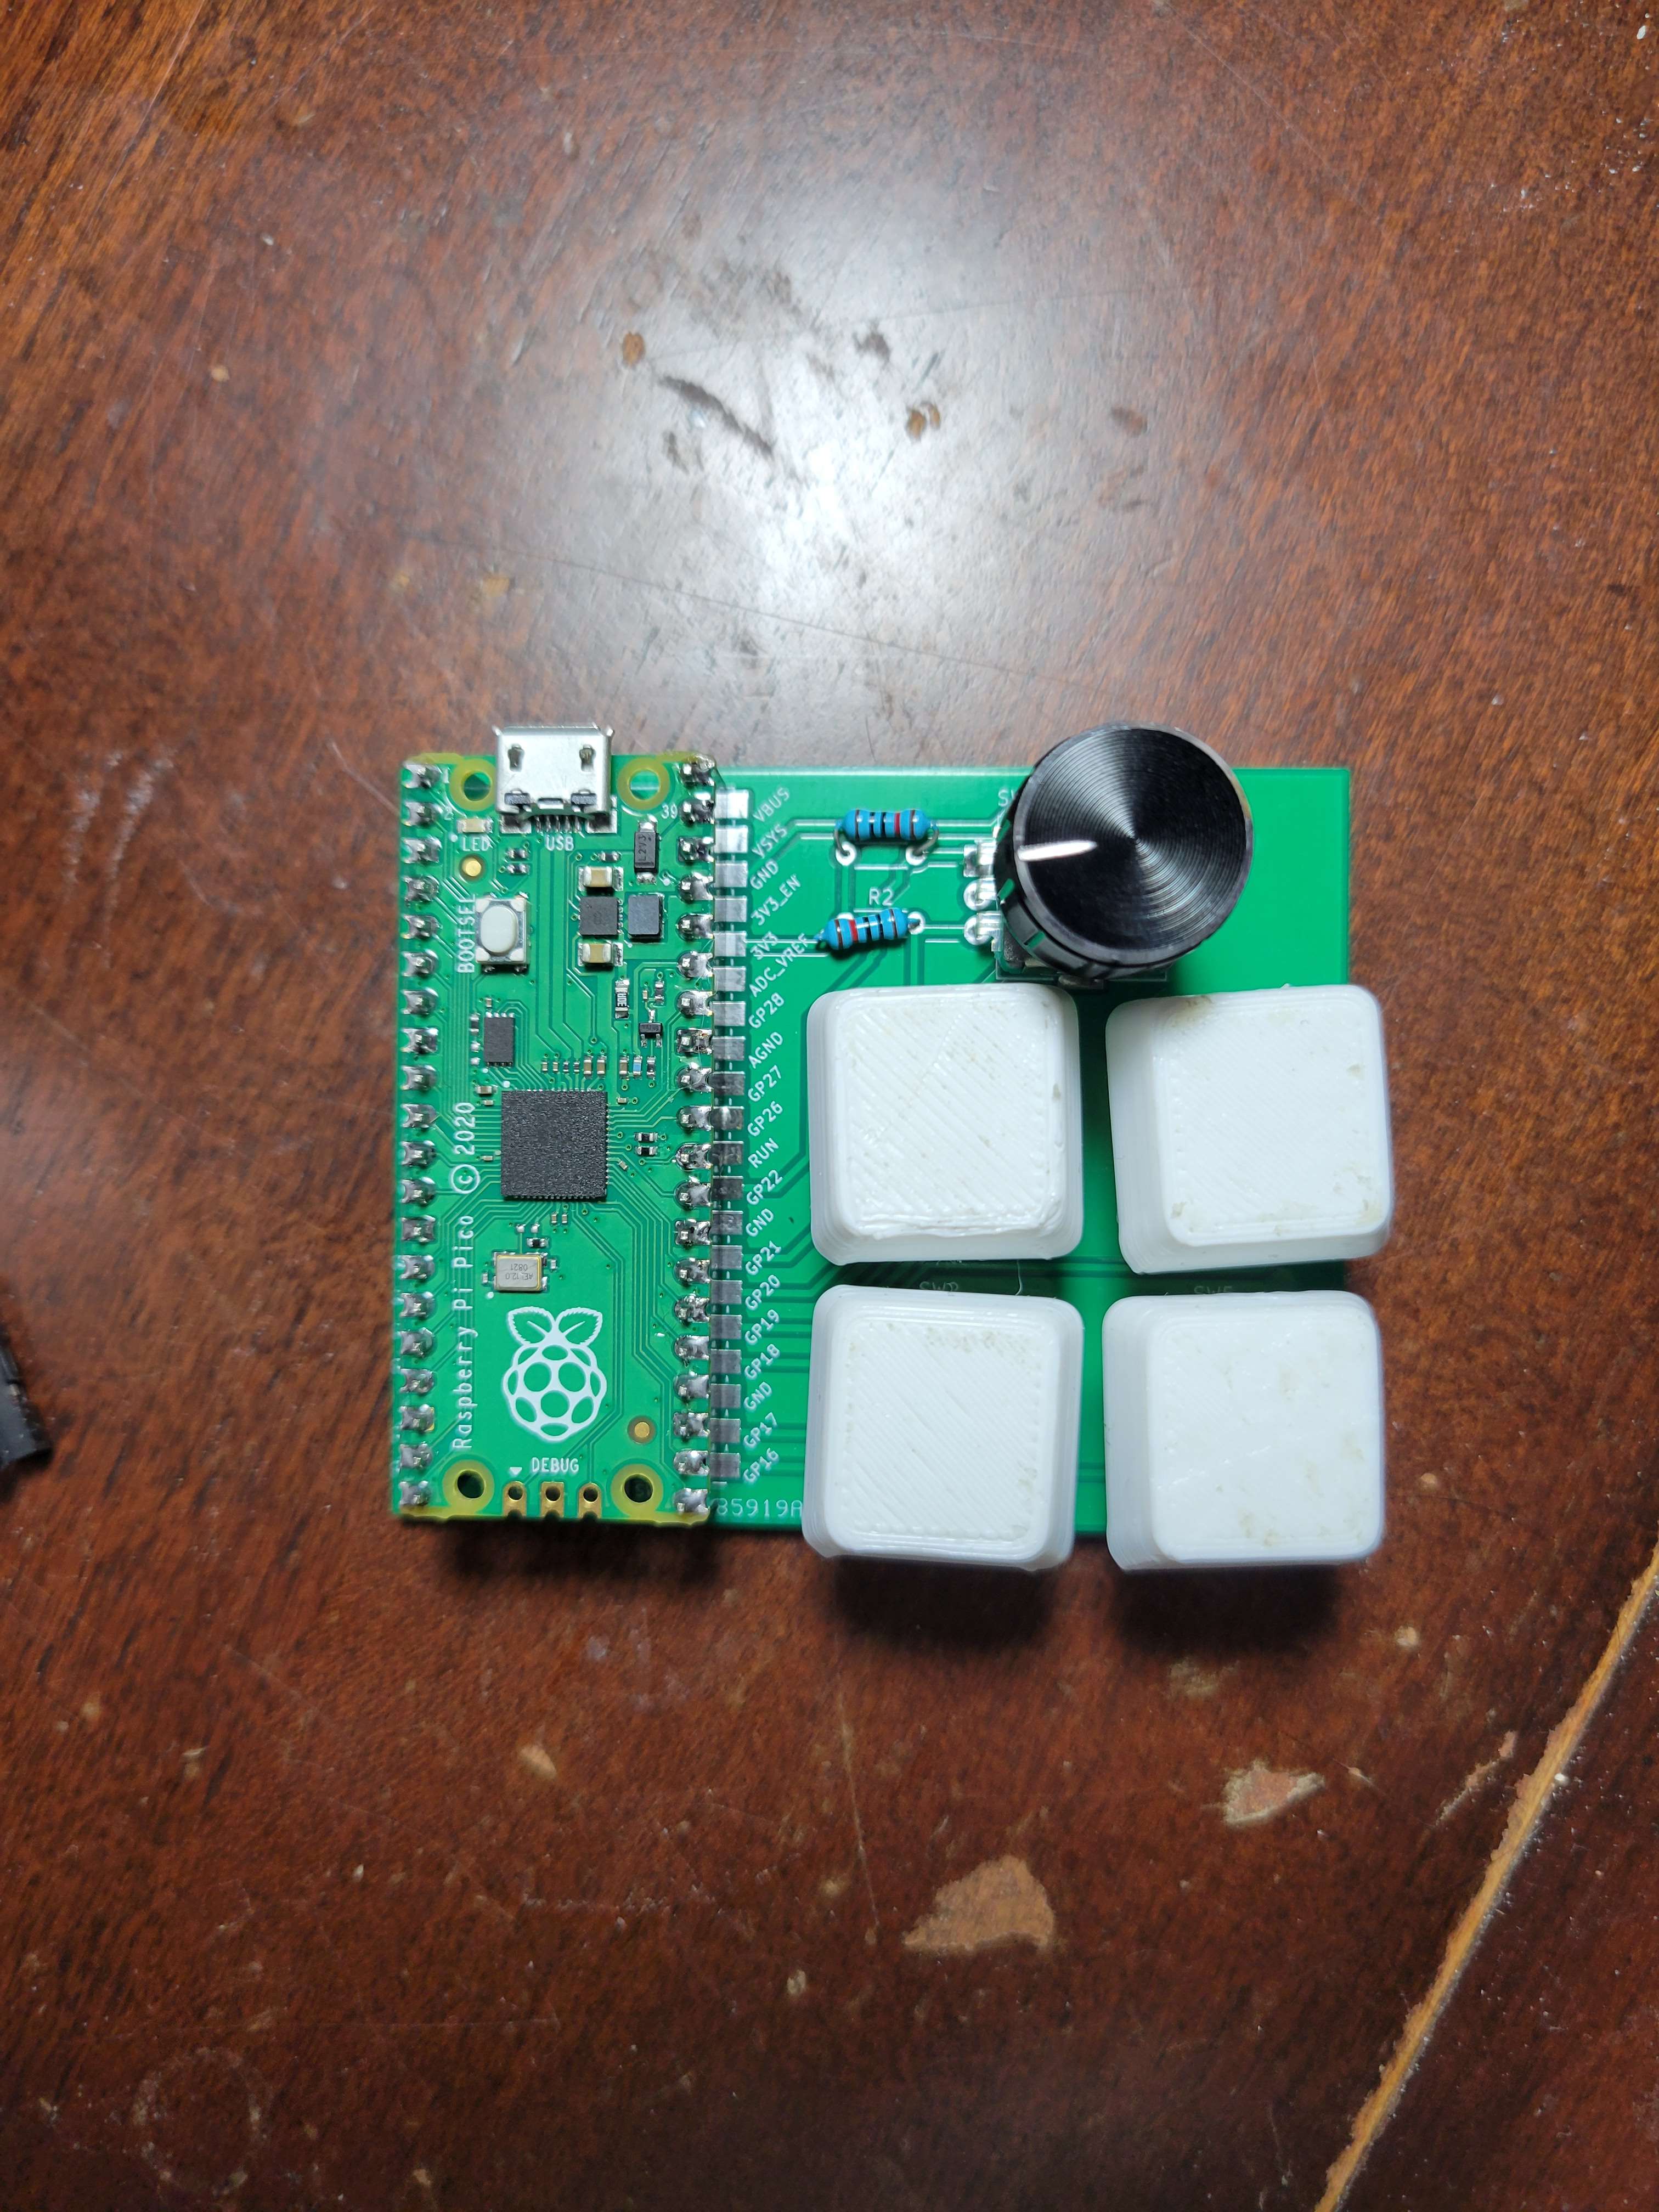
This project details the creation of a custom macro keypad, affectionately dubbed the “PicoDeck,” built around the Raspberry Pi Pico. It features mechanical keyboard switches for tactile input and a rotary encoder for intuitive media control. The device leverages CircuitPython, chosen for its ease of use and robust file system access, enabling straightforward customization of macros and keymaps. A custom Human Interface Device (HID) library facilitates its function as a versatile keyboard and media controller, while a self-designed PCB ensures a clean and integrated build.
PicoDeck Build Details
Core Components
Below is a list of the primary components used to build the PicoDeck.
- Raspberry Pi Pico
- Mechanical Keyboard Switches (e.g., Cherry MX, Gateron, Kailh)
- Keycaps (Compatible with chosen switches)
- Rotary Encoder (EC11 type with push button)
- Custom PCB (Designed in KiCad)
- USB Cable (Micro USB for Pico)
- (Optional) 3D Printed Enclosure
Raspberry Pi Pico
- Description
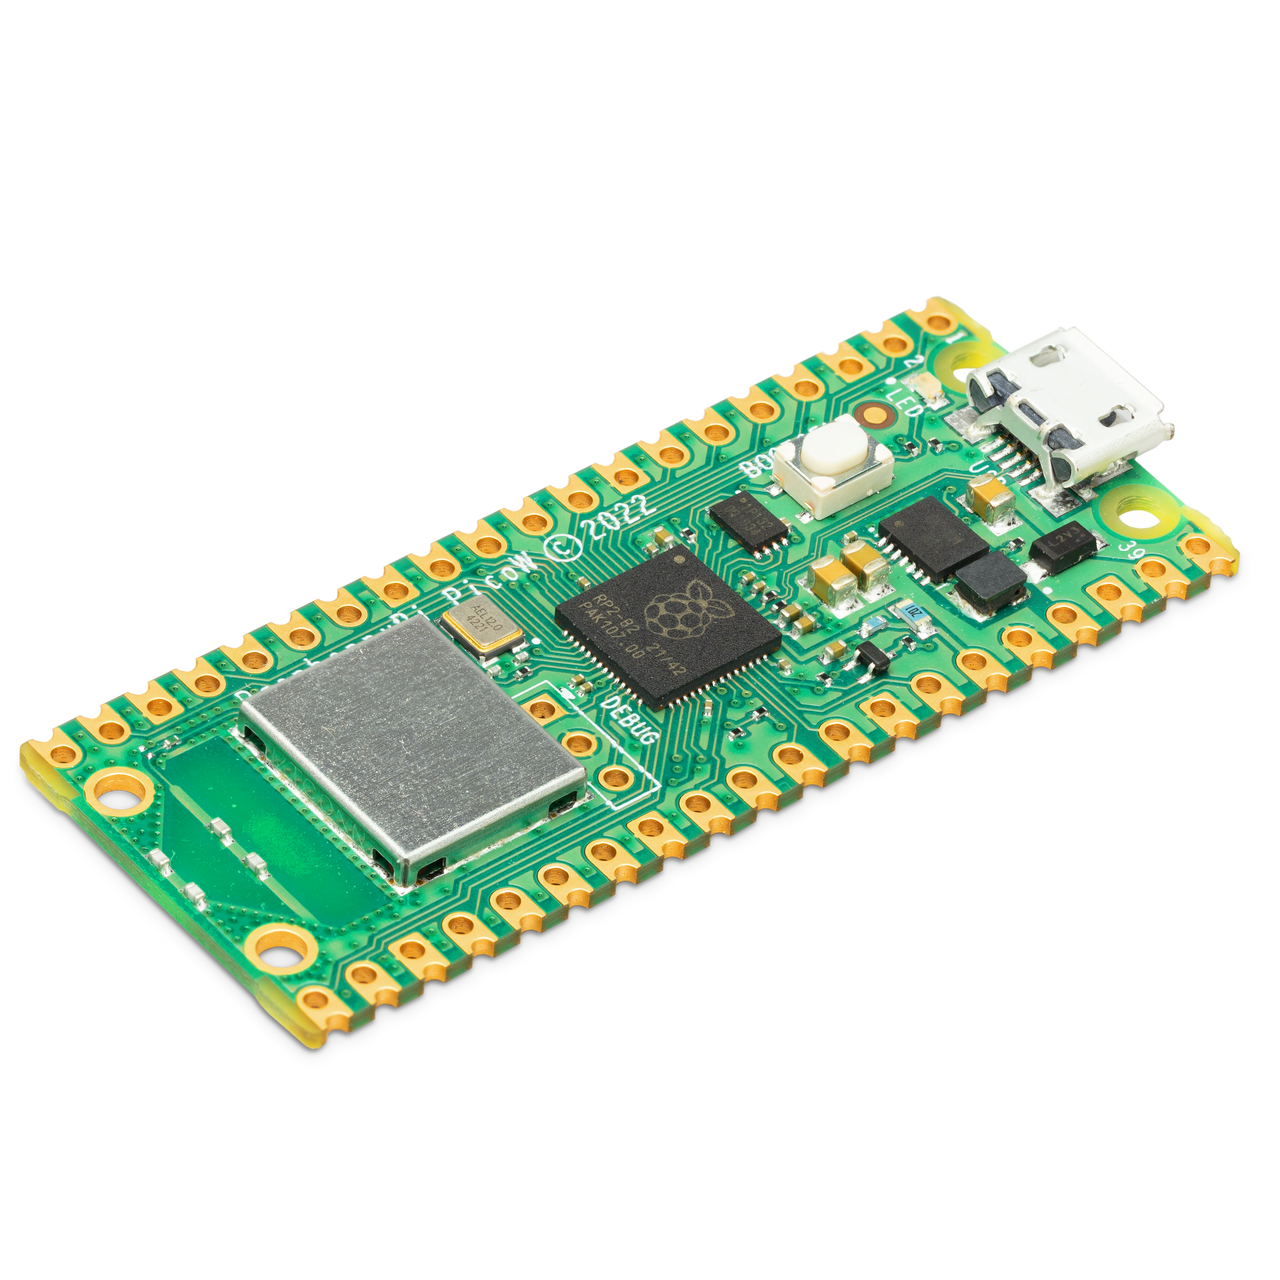
- The Raspberry Pi Pico is a low-cost, high-performance microcontroller board featuring the RP2040 chip. It was selected for this project due to its native USB support, ample GPIO pins, and excellent compatibility with CircuitPython. CircuitPython allows the Pico to appear as a USB mass storage device, making code updates as simple as editing a Python file.
- Part List
- Raspberry Pi Pico (https://www.raspberrypi.com/products/raspberry-pi-pico/)
- Software Setup
- CircuitPython must be flashed onto the Pico. This involves holding the BOOTSEL button while plugging it into a computer, then dragging the CircuitPython UF2 file onto the RPI-RP2 drive. Essential CircuitPython libraries, particularly
adafruit_hidfor keyboard and consumer control (media keys), androtaryiofor the encoder, are then copied to thelibfolder on theCIRCUITPYdrive. - Summary of Setup
- Download the correct CircuitPython UF2 for the Pico. Enter BOOTSEL mode on the Pico. Copy the UF2 file. Install necessary libraries (
adafruit_hid,rotaryio,adafruit_debouncer) into thelibfolder on theCIRCUITPYdrive.
Note: Ensure you download the latest stable version of CircuitPython and the corresponding library bundle from Adafruit to maintain compatibility and access the latest features.
- Results
- The Pico serves as the brain of the macro pad, running the CircuitPython code that scans for key presses and rotary encoder movements, and then sends the appropriate HID commands to the connected computer.
Mechanical Keyboard Switches & Keycaps
- Description
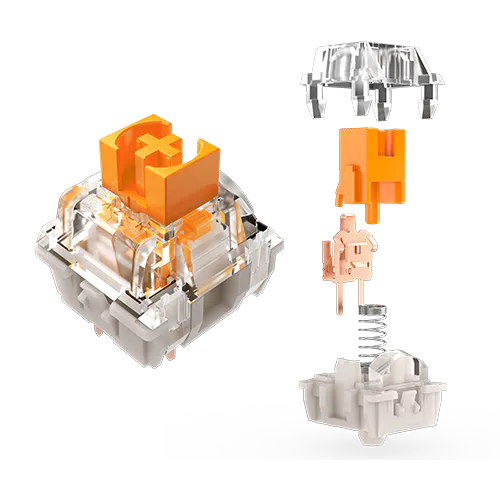
- Mechanical keyboard switches provide superior tactile feedback and durability compared to membrane keys. A variety of switch types (linear, tactile, clicky) can be chosen based on user preference. Keycaps are placed on top of the switches and can be customized for aesthetics and labeling. For this project, 4 switches were used.
- Part List
-
- Mechanical Keyboard Switches (e.g., Gateron Browns, Cherry MX Reds)
- Keycaps (MX-stem compatible, desired profile)
- Assembly
- Switches are typically press-fit into a compatible PCB or plate. If using a custom PCB, they will need to be soldered to the board. Keycaps are then pressed onto the switch stems.
- Summary of Assembly
- Mount switches onto the PCB. Solder switch pins to the PCB pads. Attach keycaps to the switches.
Note: Choose switches that match your desired feel and sound profile. Ensure keycaps are compatible with the switch stems (MX-style is most common). Careful soldering is required to avoid damaging switches or the PCB.
- Results
- Provides reliable and customizable physical inputs for triggering macros, shortcuts, or application commands. The tactile feel enhances the user experience.
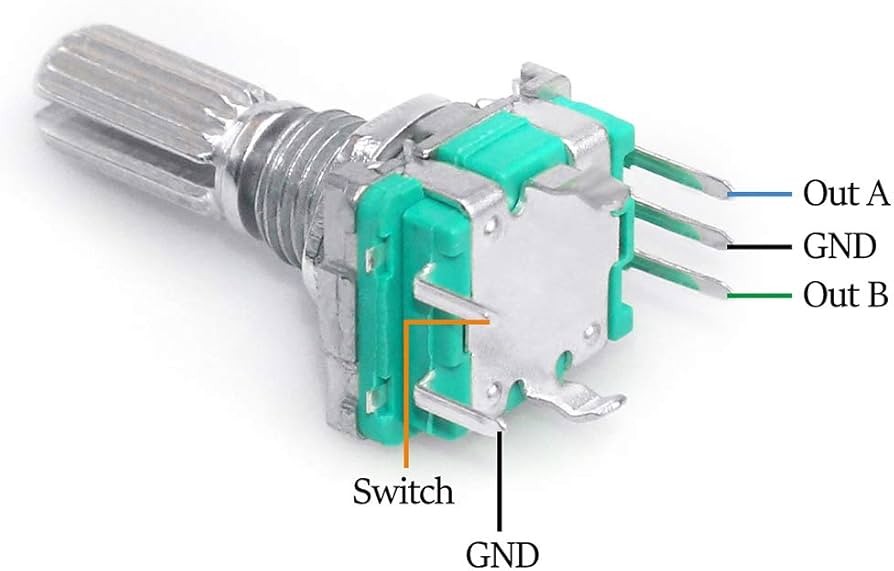
Rotary Encoder (EC11 with Push Button)
- Description
- An EC11-type rotary encoder allows for incremental adjustments (like volume control) and often includes a push-button switch (used here for play/pause). It provides a versatile input method beyond simple key presses.
- Part List
- EC11 Rotary Encoder with push-button (https://www.adafruit.com/product/377 or similar)
- Knob for the encoder shaft
- Assembly & Software
- The encoder is soldered to the PCB. In CircuitPython, the
rotaryiolibrary is used to read rotational changes, anddigitalioalong withadafruit_debounceris used to read the push-button state. These inputs are then mapped to Consumer Control HID codes for volume up/down and play/pause. - Summary of Integration
- Solder encoder to PCB. In
code.py, initializerotaryio.IncrementalEncoderfor rotation anddigitalio.DigitalInOutwithadafruit_debouncer.Debouncerfor the button. Map encoder events to HID media commands.
Note: Debouncing the push-button is crucial for reliable operation. The
rotaryiolibrary simplifies reading the encoder’s A/B phase signals. Ensure the encoder pins are correctly wired to the Pico’s GPIOs as defined in yourcode.py.
- Results
- Enables intuitive control over system volume by rotating the knob and play/pause functionality for media by pressing the knob.
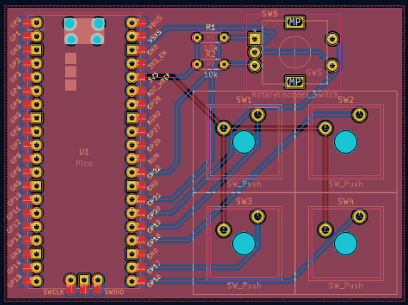
Custom PCB (KiCad Design)
- Description
- A custom Printed Circuit Board (PCB) was designed using KiCad EDA software. This allows for a compact and clean integration of the Raspberry Pi Pico, keyboard switches, rotary encoder, and any necessary supporting components (like diodes for a key matrix, if implemented). It eliminates messy point-to-point wiring.
- Part List
-
- Custom PCB (fabricated from Gerber files generated by KiCad)
- (Optional) Diodes (e.g., 1N4148) if implementing a key matrix.
- Headers for Pico (optional, can solder Pico directly).
- Design & Fabrication
- The PCB layout involves placing footprints for all components, routing traces to connect them according to the schematic, and then generating Gerber files. These Gerbers are sent to a PCB fabrication house (e.g., JLCPCB, PCBWay, OSH Park) for manufacturing.
- Summary of Process
- Design schematic in KiCad. Lay out components and route traces on PCB. Generate Gerber files. Order PCB from a fabrication service. Solder all components onto the received PCB.
Note: Designing a PCB can have a learning curve. Pay close attention to component footprints, trace widths, and clearance rules. For a key matrix, ensure correct diode orientation. Thoroughly check your design before sending it for fabrication to avoid costly errors.
- Results
- A professional-looking and robust platform for all components. Simplifies assembly, improves reliability, and provides a solid foundation for the macro pad.
CircuitPython & Custom HID Programming
- Description
- CircuitPython was chosen for its Pythonic syntax, ease of iteration (code changes are live on save), and excellent library support. The
adafruit_hidlibrary is pivotal, providing classes to emulate a keyboard (Keyboard), mouse (Mouse), and consumer control device (ConsumerControl). This allows the PicoDeck to send standard keyboard shortcuts, type text, and control media playback.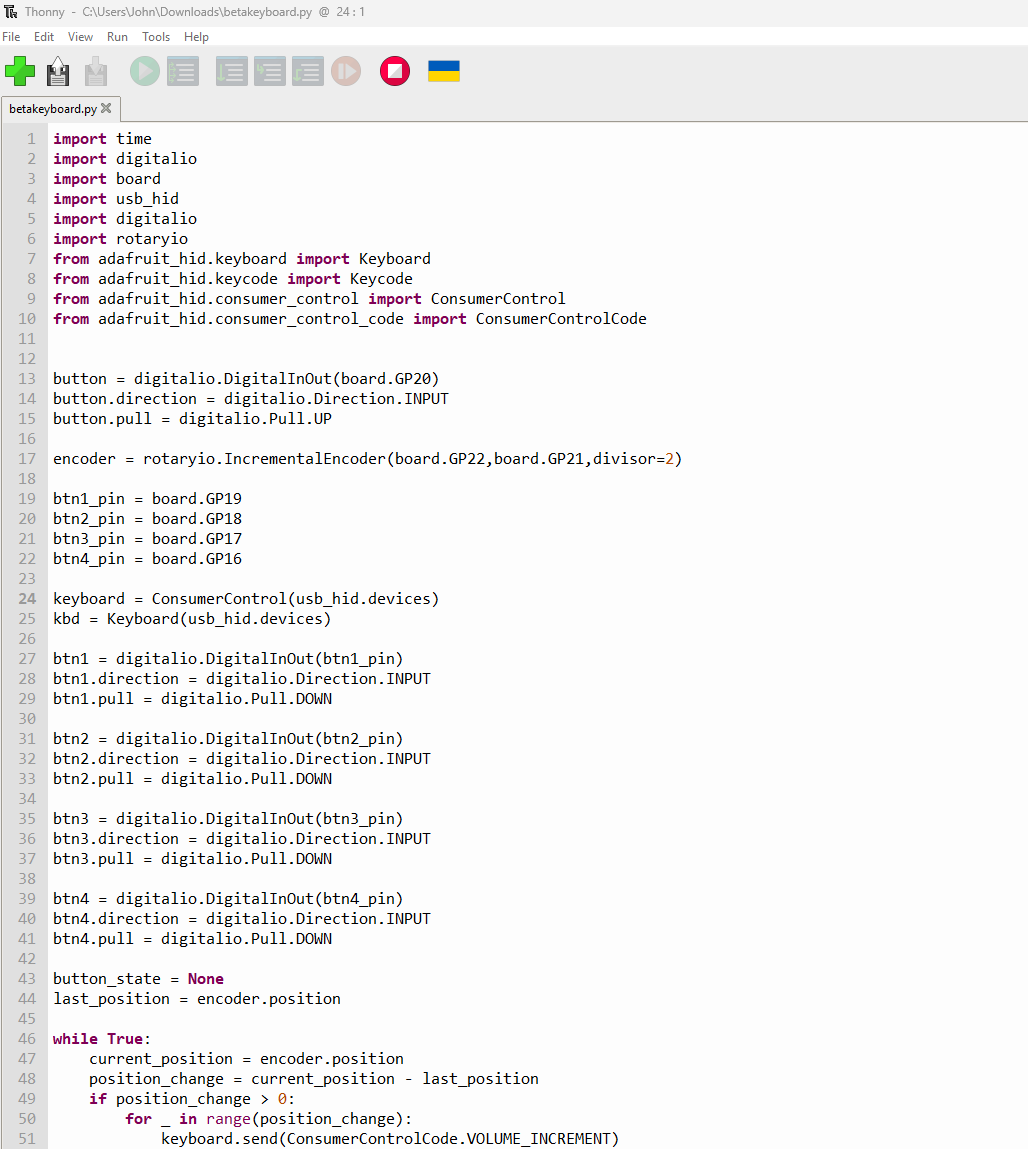
- Software Components
-
- CircuitPython firmware for Raspberry Pi Pico
adafruit_hidCircuitPython libraryrotaryioCircuitPython libraryadafruit_debouncerCircuitPython library- Custom
code.pyscript
- Implementation
- The main
code.pyscript initializes the GPIO pins connected to switches and the rotary encoder. It runs a loop that:- Scans the state of each switch.
- Reads the rotary encoder’s position and button state.
- Based on detected inputs, uses the
adafruit_hid.Keyboardobject to send key presses/combinations (e.g.,kbd.send(Keycode.CONTROL, Keycode.C)) or theadafruit_hid.ConsumerControlobject to send media commands (e.g.,cc.send(ConsumerControlCode.VOLUME_INCREMENT)).
- Summary of Code Logic
- Initialize HID devices (Keyboard, ConsumerControl). Configure GPIO pins for inputs. In the main loop, read all inputs. If an input event occurs (key press, encoder turn/press), send the corresponding HID report.
Note: To make the Pico appear as a composite HID device (e.g., keyboard + media controller), you might need to create a custom
boot.pyfile to define the USB descriptors, or ensure your CircuitPython version handles this gracefully with multipleadafruit_hiddevice instances. The file system access of CircuitPython means you can easily editcode.pyto change key mappings without re-flashing firmware.
- Results
- A highly customizable macro pad that can send complex keyboard shortcuts, type predefined strings, control applications, and manage media playback seamlessly on any computer that supports USB HID devices.
Full Build Guide & Resources
For those interested in building their own PicoDeck, a more comprehensive step-by-step guide, including KiCad project files, and CircuitPython code examples, will be made available.
This detailed documentation will cover:
- KiCad: Schematic and PCB layout walkthrough, Gerber generation.
-
CircuitPython: Full
code.pyexamples for key scanning (direct IO or matrix), rotary encoder handling, debouncing, and sending various HID commands. Configuration for custom keymaps. - Link to Guide